vue快速入门03生命周期 vue生命周期的四个阶段 vue对象从创建到销毁的整个过程
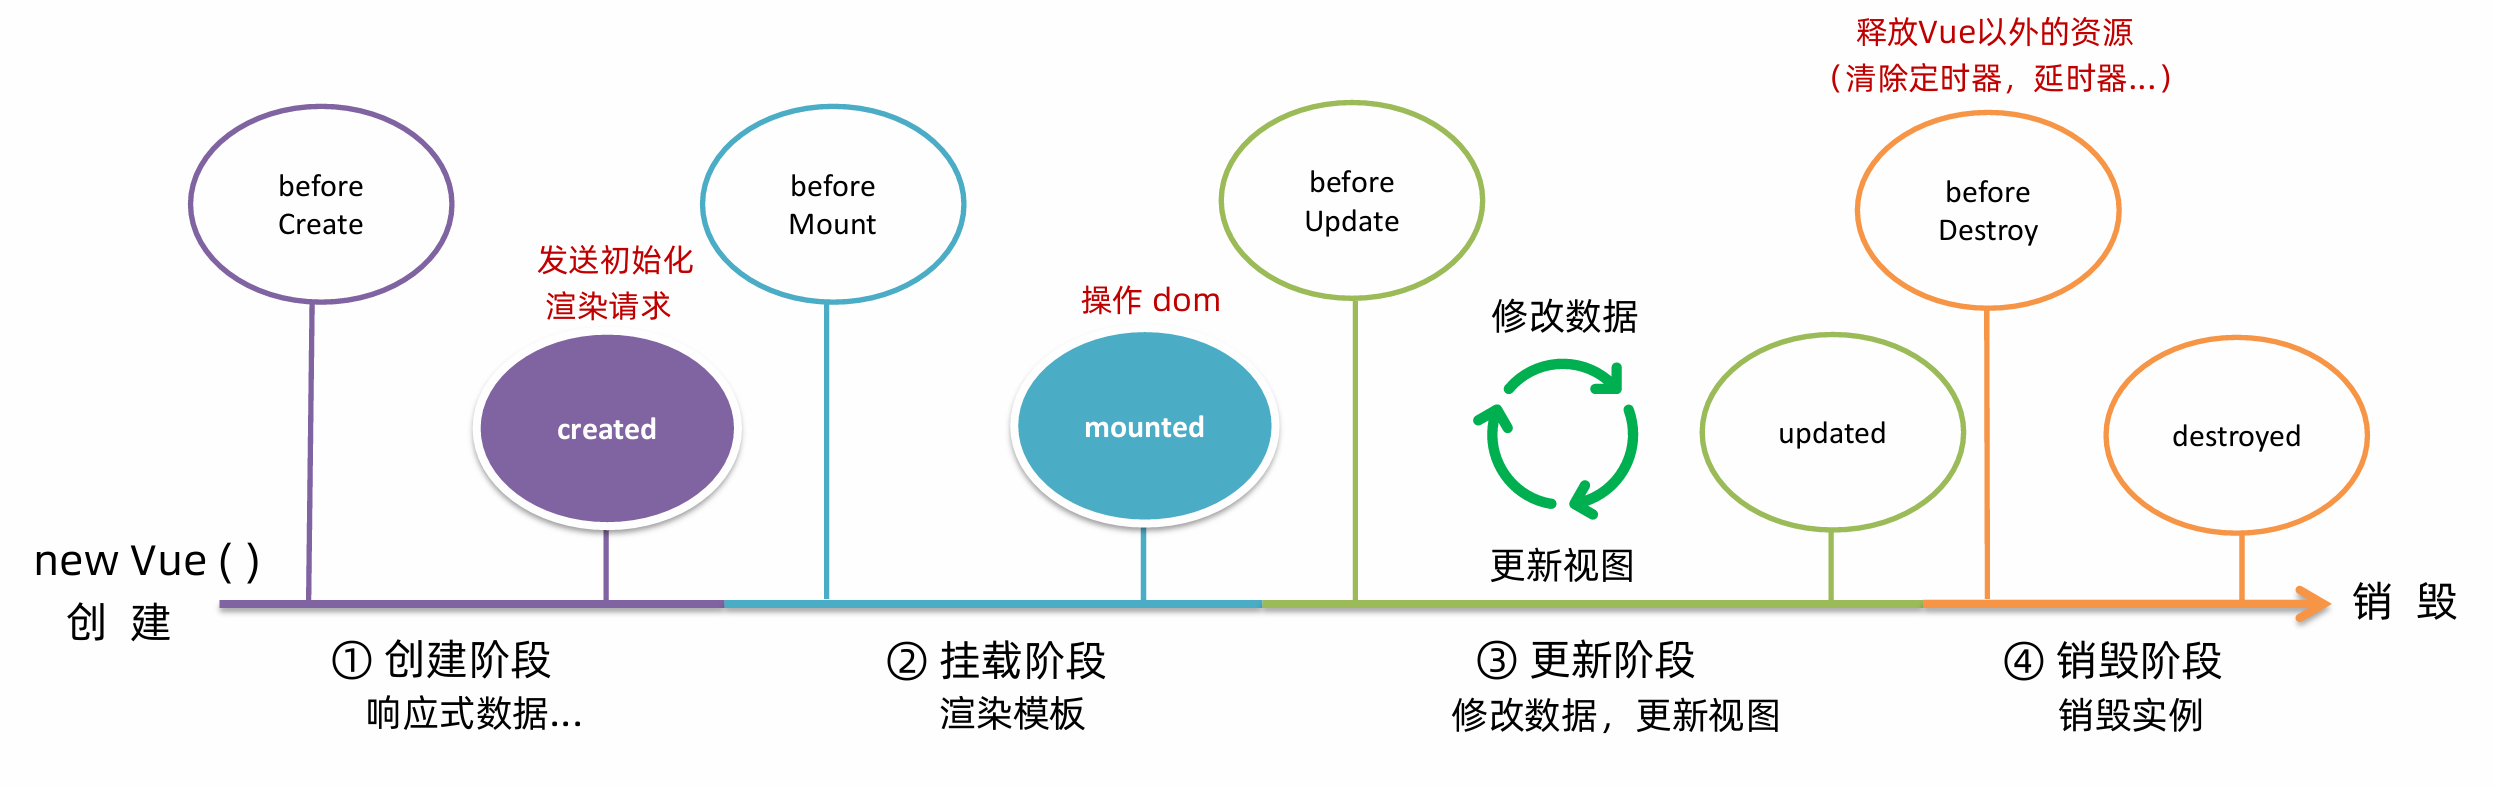
Vue生命周期的四个阶段:
创建
初始化操作,普通数据转变为响应式数据
该阶段可以发送初始化渲染请求
挂载
更新
销毁
vue生命周期函数(钩子函数) 在vue生命周期过程中,会自动运行一些函数,本称之为生命周期钩子 ,可以让开发者在特定阶段 运行自己的代码
在整个生命周期中一共8个钩子函数,如下图所示:
1 2 3 4 5 6 7 8 9 10 11 12 13 14 15 16 17 18 19 20 21 22 23 24 25 26 27 28 29 30 31 32 33 34 35 36 37 38 39 40 41 42 43 44 45 46 47 48 49 50 51 52 53 54 55 56 57 <body > <div id ="app" > <div class ="counter" > <h1 > {{title}}</h1 > <div class ="buttons" > <button class ="button" @click ="number--" > -</button > <div class ="value" id ="value" > {{number}}</div > <button class ="button" @click ="number++" > +</button > </div > </div > </div > <script src ="https://cdn.jsdelivr.net/npm/vue@2/dist/vue.js" > </script > <script > const app = new Vue ({ el : "#app" , data : { title : "计数器" , number : 100 }, beforeCreate ( console .log ("响应式数据准备之前" ) }, created ( console .log ("响应式数据准备之后" ) this .number = 200 }, beforeMount ( console .log ("模板渲染之前" , document .querySelector ("h1" ).innerHTML ) }, mounted ( console .log ("模板渲染之后" , document .querySelector ("h1" ).innerHTML ) }, beforeUpdate ( console .log ("数据修改了,但视图并未更新" , document .querySelector (".value" ).innerHTML ) }, updated ( console .log ("数据修改了,视图已经更新" , document .querySelector (".value" ).innerHTML ) }, beforeDestroy ( console .log ("beforeDestroy" ) }, destoyed ( console .log ("destroyed" ) } }) </script > </body >
实例:搜索框一进入页面立刻获取焦点
1
2
3
4
5
6
7
8
9
10
11
12
13
14
15
16
17
18
19
20
21
22
23
24
25
26
27
28
29
30
31
32
33
34
35
36
37
38
39
40
41
42
43
44
45
46
47
48
49
50
51
52
53
54
55
56
57
58
59
60
61
62
63
64
65
66
67
68
69
70
71
72
73
74
75
76
77
78
79
80
81
82
83
84
85
86
87
88
<!DOCTYPE html > <html lang ="zh-CN" > <head > <meta charset ="UTF-8" > <meta name ="viewport" content ="width=device-width, initial-scale=1.0" > <title > 搜索页面</title > <style > body { display : flex; justify-content : center; align-items : center; height : 100vh ; margin : 0 ; background-color : #f0f0f0 ; font-family : Arial, sans-serif; } .search-container { text-align : center; } .logo { display : flex; align-items : center; justify-content : center; margin-bottom : 20px ; } .logo-text { font-size : 1.5em ; font-weight : bold; } .search-bar { display : flex; align-items : center; border : 1px solid #ccc ; border-radius : 5px ; overflow : hidden; } .search-bar input { flex : 1 ; padding : 10px ; border : none; outline : none; } .search-button { padding : 10px 20px ; background-color : #c43c3c ; color : white; border : none; cursor : pointer; outline : none; } </style > </head > <body > <div id ="app" > <div class ="search-container" > <div class ="logo" > <div class ="logo-text" > 搜索一下</div > </div > <div class ="search-bar" > <input type ="text" placeholder ="搜索内容..." > <button class ="search-button" > 搜索一下</button > </div > </div > </div > <script src ="https://cdn.jsdelivr.net/npm/vue@2/dist/vue.js" > </script > <script > const app = new Vue ({ el : "#app" , data : { }, mounted ( document .querySelector (".search-bar input" ).focus () } }) </script > </body > </html >
工程化开发入门 开发Vue的两种方式
核心包传统开发方式:基于html/css/js文件,直接引入核心包,开发Vue
工程化开发模式:基于构建工具(例如webpack)的环境中开发Vue
脚手架 Vue CLI Vue CLI是Vue官方提供的一个全局命令工具,可以帮助我们快速创建一个开发Vue项目的标准化基础架子(集成了Webpack配置)
好处:
使用步骤:
全局安装(初次使用时执行):npm i @vue/cli -g或者yarn global add @vue/cli
查看vue版本:vue --version
创建项目架子:vue create project-name(注意:项目名不能用中文)
启动项目:npm run serve或者yarn serve(具体启动的命令参考项目中的package.json)
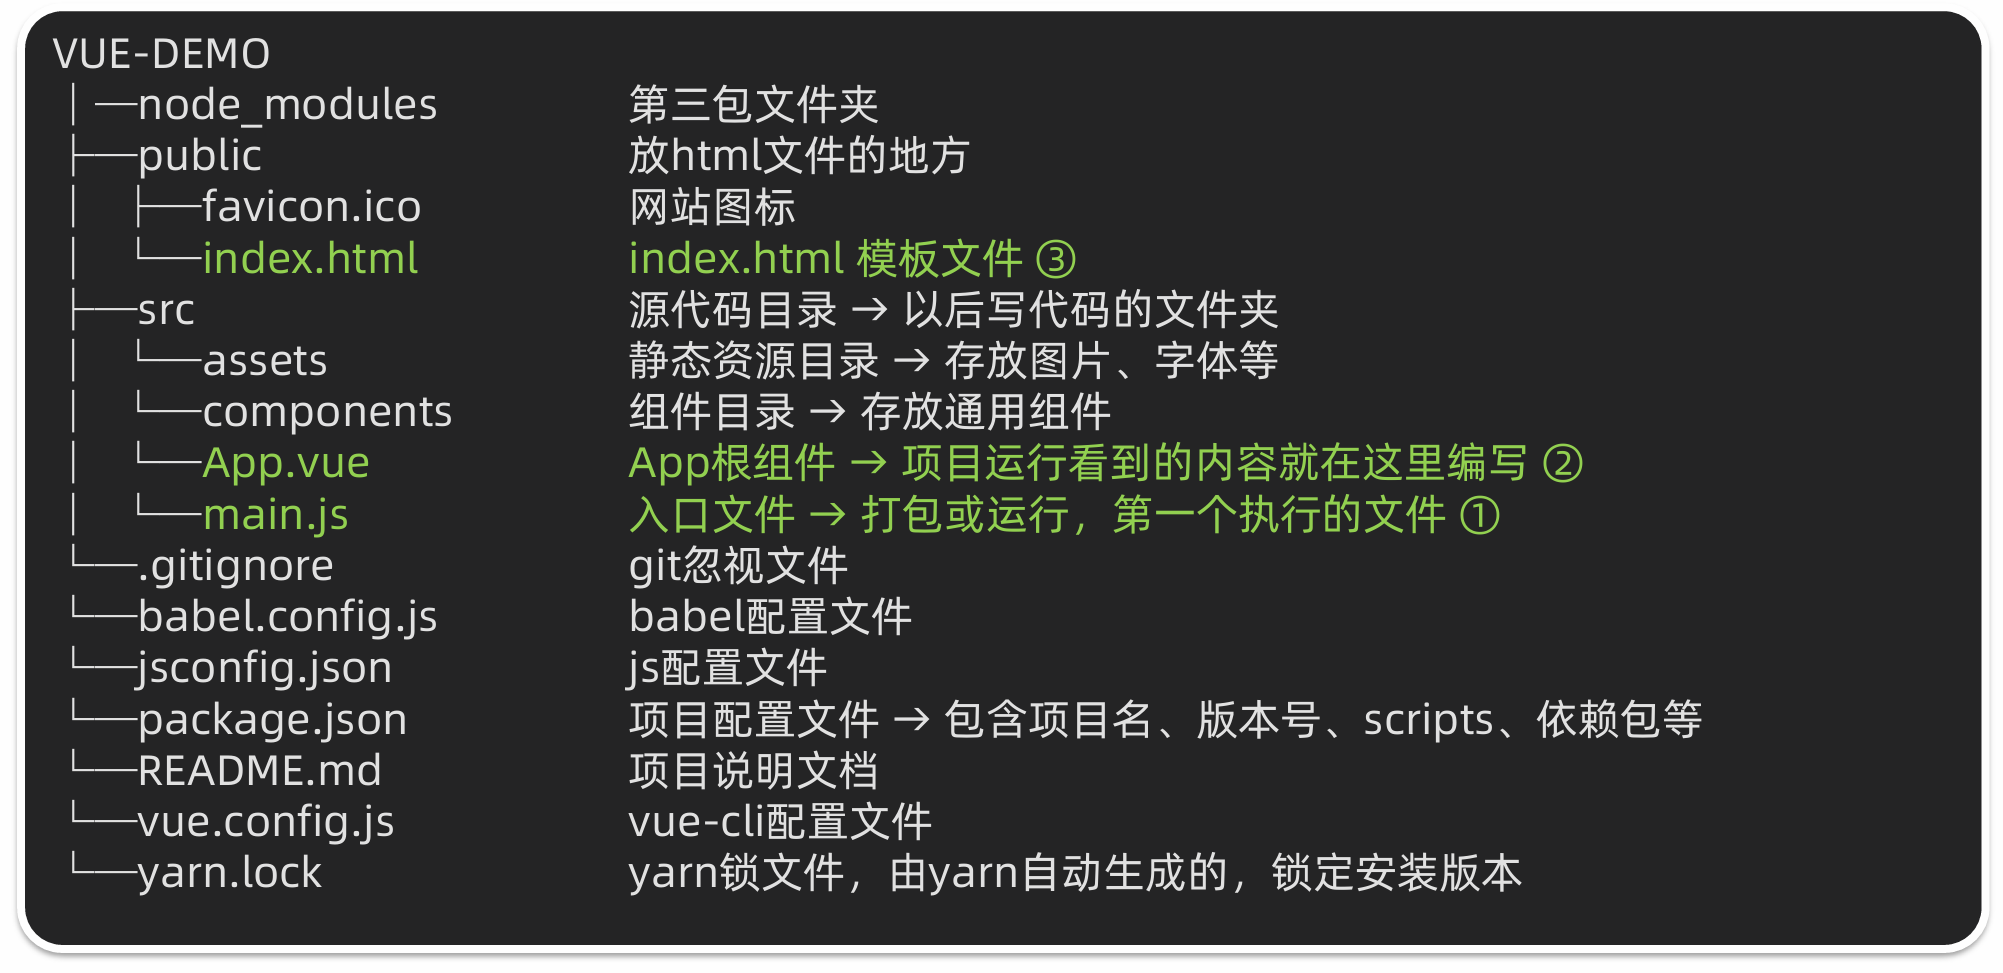
文件目录结构 利用脚手架创建出来的项目的目录结构
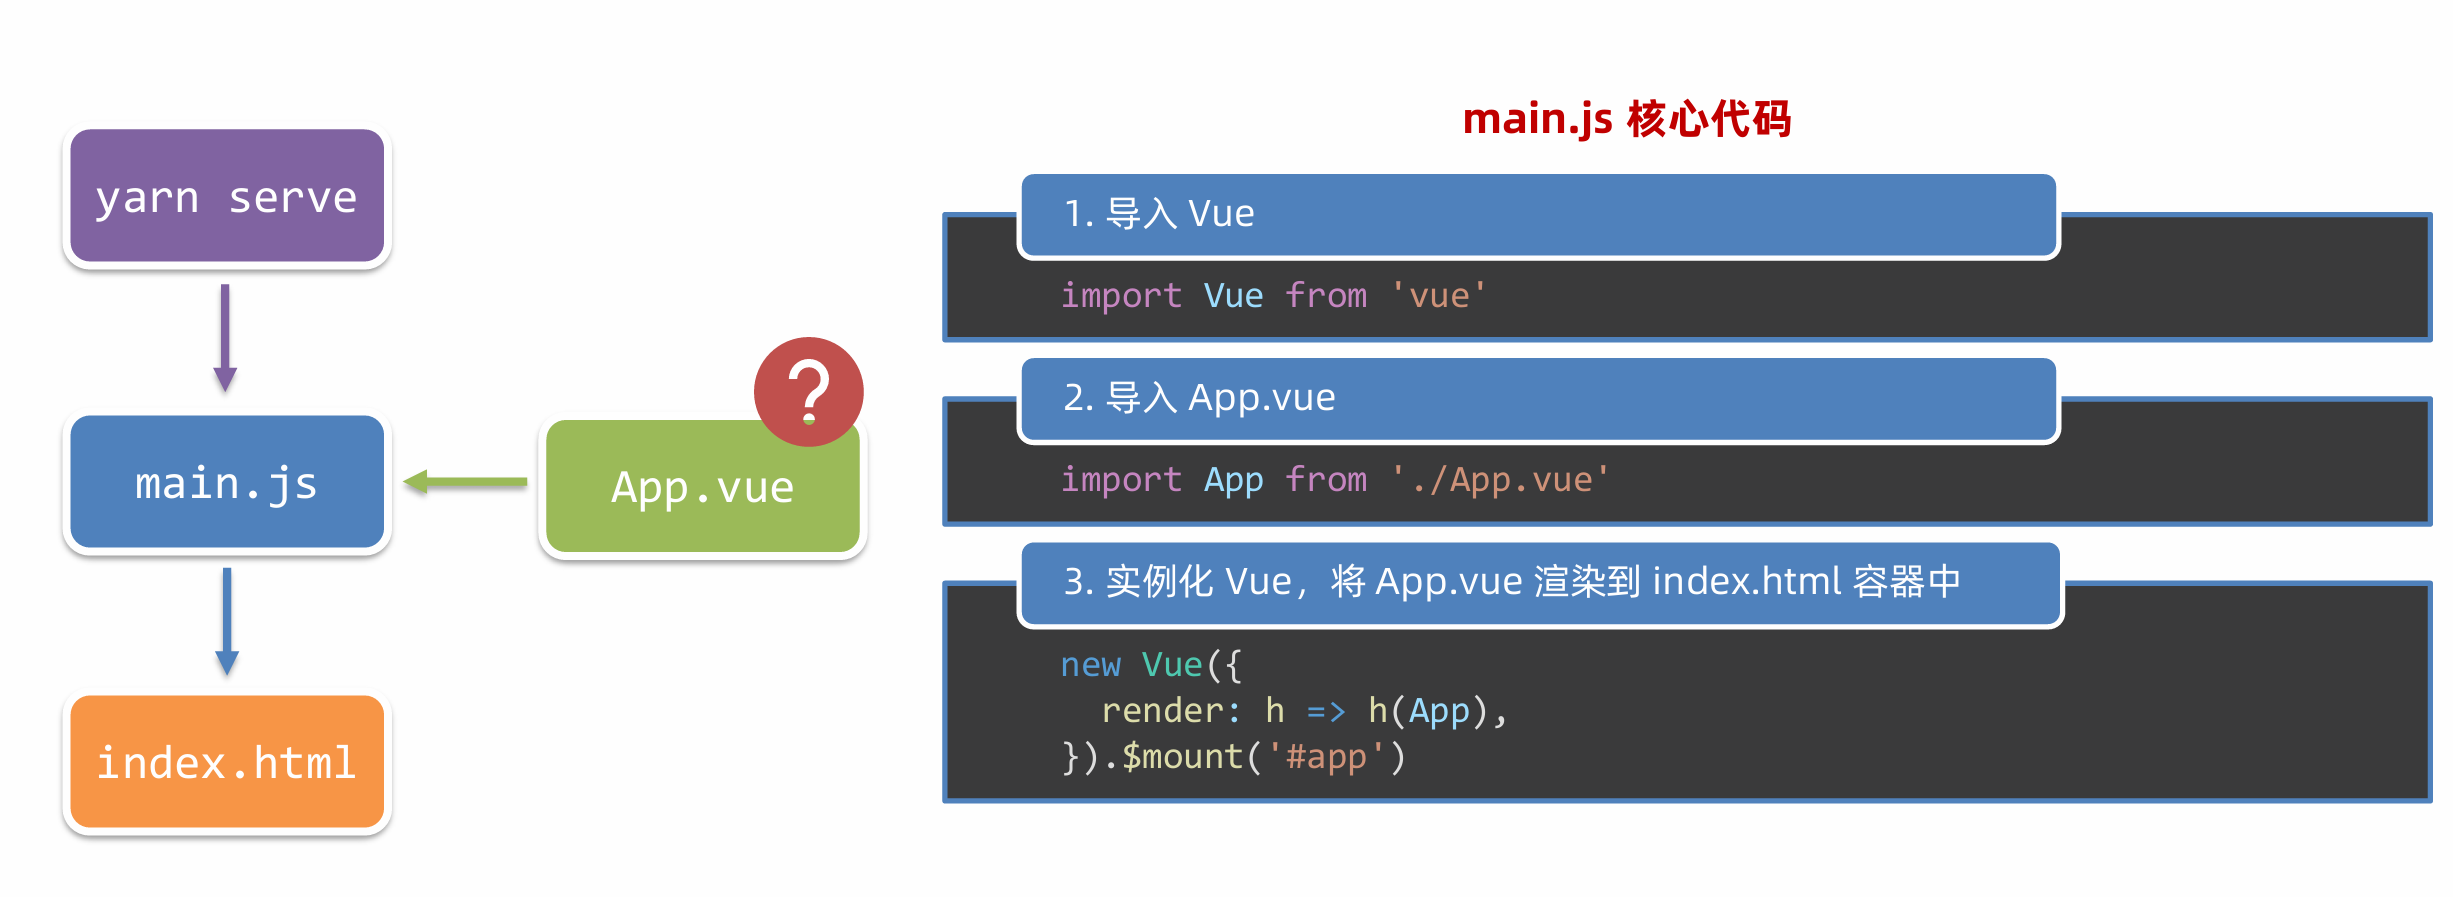
项目运行解析流程
组件化开发 组件化
一个页面可以拆分成一个个组件,每个组件有着自己独立的结构、样式、行为。
组件化可以便于维护,利于复用,从而提高开发效率
组件可以分为两类:
普通组件
根组件
App.vue文件,整个应用最上层的组件,包裹所有普通小组件
App.vue文件
App.vue文件(单个组件文件)包含三个组成部分
template:结构,有且只有一个根元素script:js逻辑代码style:样式
1
2
3
4
5
6
7
8
9
10
11
12
13
14
15
16
17
18
19
20
21
22
23
24
25
26
27
28
29
30
31
<template> <!--组件的结构代码--> <div class="father"> <div class="son" @click="show">大的</div> </div> </template> <script> //导出当前组件的配置项 //里面可以提供data、methods、computed、watch、生命周期钩子函数等 export default{ methods:{ show(){ alert("你点击了son div元素") } } } </script> <style> .father{ width: 300px; height: 300px; background-color: blue; } .son{ width: 100px; height: 100px; background-color: red; } </style>
补充:vscode语法高亮插件Vetur
普通组件的注册使用 组件注册的两种方式 局部注册 只能在注册的组件内使用
创建.vue文件
在使用的组件内导入并注册
1
2
3
4
5
6
7
8
9
<!--导入--> import 组件名 from 'xxx.vue' <!--注册--> export default{ components:{ 组件名称 :导入的组件名 } }
使用的时候,直接当成html标签使用,<组件名></组件名>
注意组件名的命名规范:大驼峰命名法,比如XxxHhhh
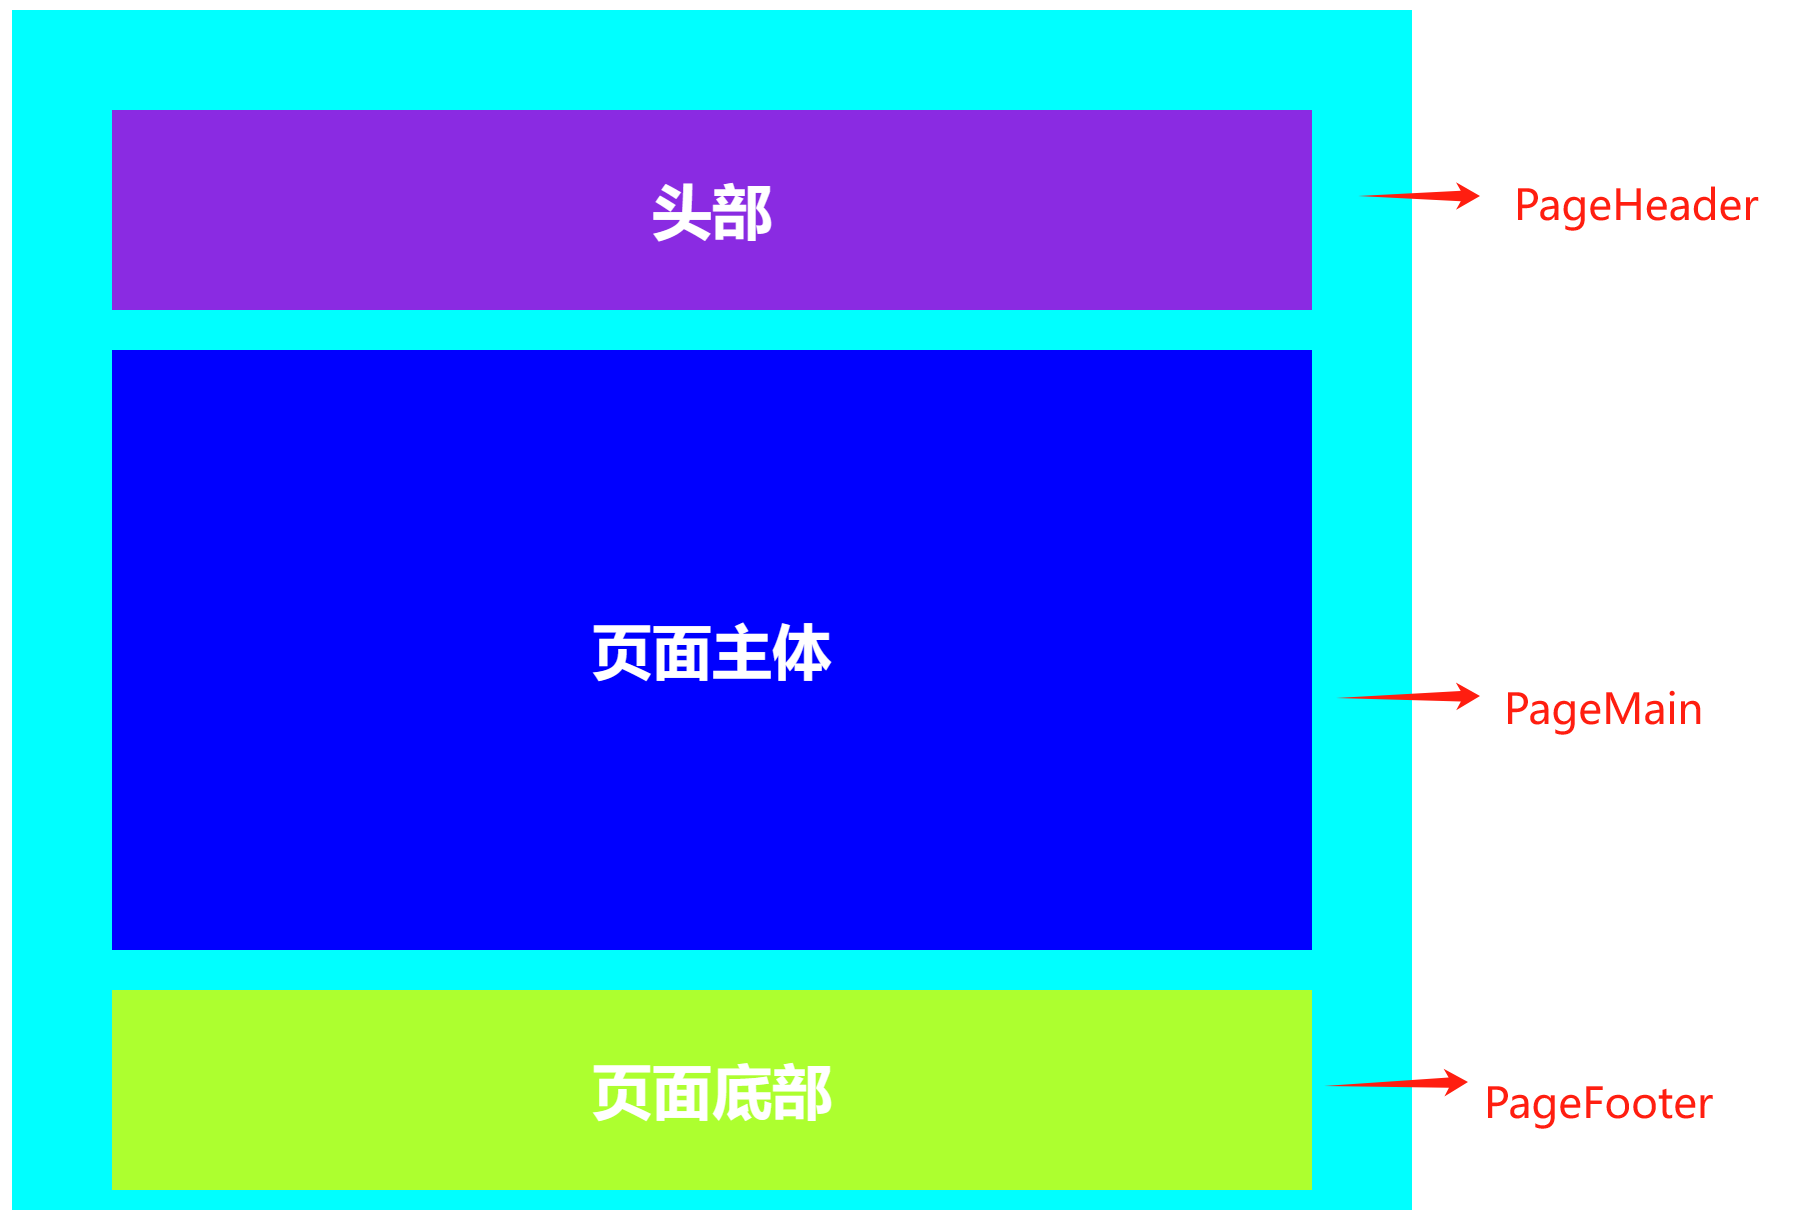
使用实例
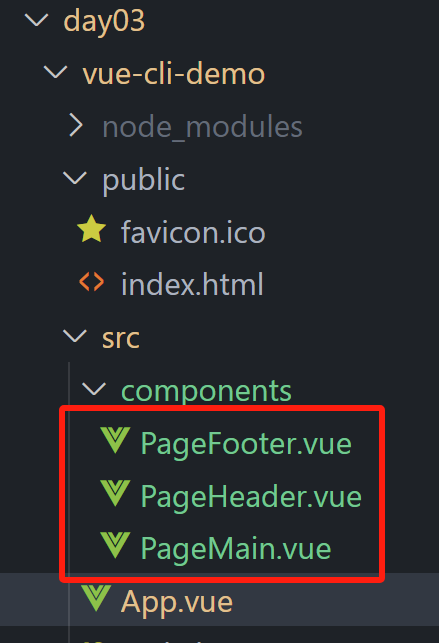
将上图中的页面拆分为三个不同的组件:PageHeader、PageMain、PageFooter
PageHeader代码
1
2
3
4
5
6
7
8
9
10
11
12
13
14
15
16
17
18
19
20
21
22
<!--页面头部组件--> <template> <div class="header">头部</div> </template> <script> export default { } </script> <style> .header{ height: 100px; background-color: blueviolet; text-align: center; line-height: 100px; font-size: 30px; color: white; font-weight: 700; } </style>
PageMain代码
1
2
3
4
5
6
7
8
9
10
11
12
13
14
15
16
17
18
19
20
21
22
23
<!--页面头部组件--> <template> <div class="main">页面主体</div> </template> <script> export default { } </script> <style> .main{ margin: 20px 0; height: 300px; background-color: blue; text-align: center; line-height: 300px; font-size: 30px; color: white; font-weight: 700; } </style>
PageFooter代码
1
2
3
4
5
6
7
8
9
10
11
12
13
14
15
16
17
18
19
20
21
22
<!--页面头部组件--> <template> <div class="footer">页面底部</div> </template> <script> export default { } </script> <style> .footer{ height: 100px; background-color: greenyellow; text-align: center; line-height: 100px; font-size: 30px; color: white; font-weight: 700; } </style>
App.vue代码
1
2
3
4
5
6
7
8
9
10
11
12
13
14
15
16
17
18
19
20
21
22
23
24
25
26
27
28
29
30
31
32
<template> <div class="app"> <MyHeader></MyHeader> <MyMain></MyMain> <MyFooter></MyFooter> </div> </template> <script> import PageHeader from './components/PageHeader.vue'; import PageMain from './components/PageMain.vue'; import PageFooter from './components/PageFooter.vue'; export default { components:{ MyHeader:PageHeader, MyMain:PageMain, MyFooter:PageFooter } } </script> <style> .app{ margin: 10px auto; padding: 50px; width: 600px; height: 500px; background-color: aqua; text-align: center; } </style>
全局注册 在所有组件内都能使用
创建.vue文件
在main.js中进行全局注册
在各个组件中均使用的通用组件,就可以把它定义为全局组件
全局注册的语法
1 2 3 4 5 import 组件名 from "xxxx.vue"
全局注册之后,任意其他组件中均可直接使用(不用在使用的组件内导入注册该组件),使用的时候,直接当成html标签使用,<组件名></组件名>
总结 项目页面开发的思路
分析页面,按照模块对页面进行拆分,搭架子(一般局部注册,在多个组件中均使用的组件,可以考虑进行全局注册)
根据设计图,编写组件html结构和css样式
拆分封装通用的小组件
实现完静态结构后,通过js动态渲染,实现页面的相关功能

 微信
微信 支付宝
支付宝